
ZMK Key Remapping Guide
This guide applies to ZMK keyboards of every layout: compact single-piece boards, standard keyboards, and split keyboards. The key difference is not the number of halves, but whether the firmware supports ZMK Studio for live editing or requires a Keymap Editor workflow followed by a firmware flash.
Choose your remapping method
ZMK Studio is the quickest route when your keyboard firmware supports it. Connect the keyboard by USB, edit the layout in a browser, save, and the change takes effect without reflashing.
Keymap Editor is for keyboards whose maker provides a ZMK configuration repository. You fork that repository to your GitHub account, make visual changes, let GitHub Actions build a new firmware, then flash the resulting file to the keyboard.
If you are unsure which route to use, check the product documentation first. Do not flash a firmware intended for another keyboard model.
Before changing any key
- Start with one small change and test it before making more.
- Remember that the layout view represents physical switch positions, not the legend printed on each keycap.
- Note which layer you are editing. The base layer is often called
Default,Base, or layer0; higher layers hold numbers, symbols, navigation, media, or Bluetooth controls. - Keep a known working firmware file or configuration commit so you can return to it if needed.
These rules are the same for a single keyboard and a split keyboard.
Method 1: remap with ZMK Studio
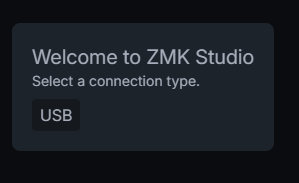
Use ZMK Studio only when the keyboard firmware explicitly supports it. Connect the keyboard to the computer with a data-capable USB cable, then open https://zmk.studio in Google Chrome or Microsoft Edge.
- Choose USB and select your keyboard in the browser device picker.
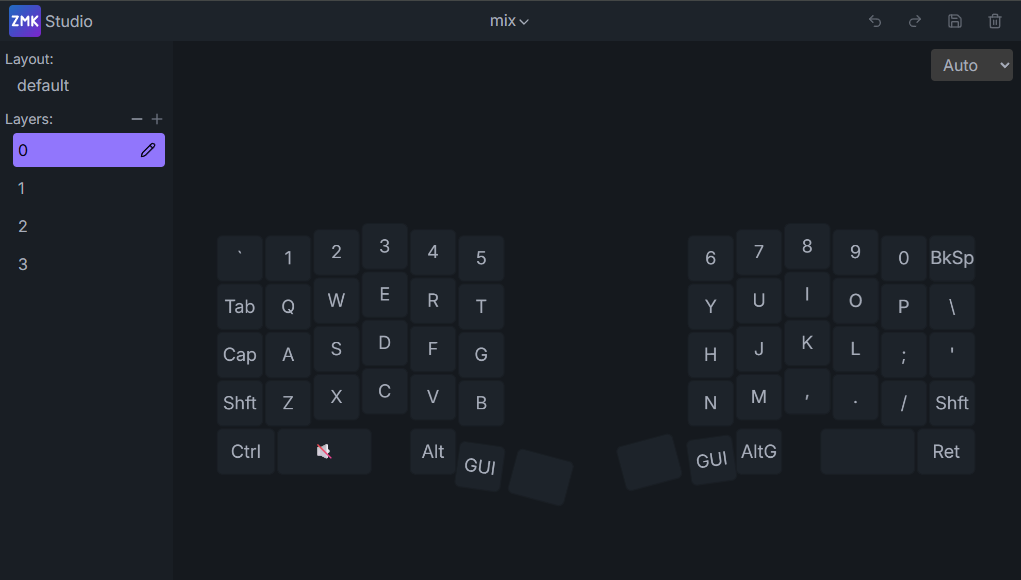
- Select the layer you want to edit.
- Click the physical key position in the layout.
- Choose the new action from the key library, such as a letter, media key, mouse key, or layer action.
- Save the change, then test the key before disconnecting.
For a split keyboard, connect the half identified by the maker as the central, primary, or USB half. You still edit one complete keymap; the other half normally does not need a separate change. For a single keyboard, simply connect its USB port.
Method 2: remap with Keymap Editor
Use this route when your keyboard maker supplies a ZMK configuration repository. First create your own copy of that repository on GitHub with Fork. This keeps your changes private to your account and lets GitHub build your own firmware. If GitHub asks you to enable Actions for the new repository, enable them.
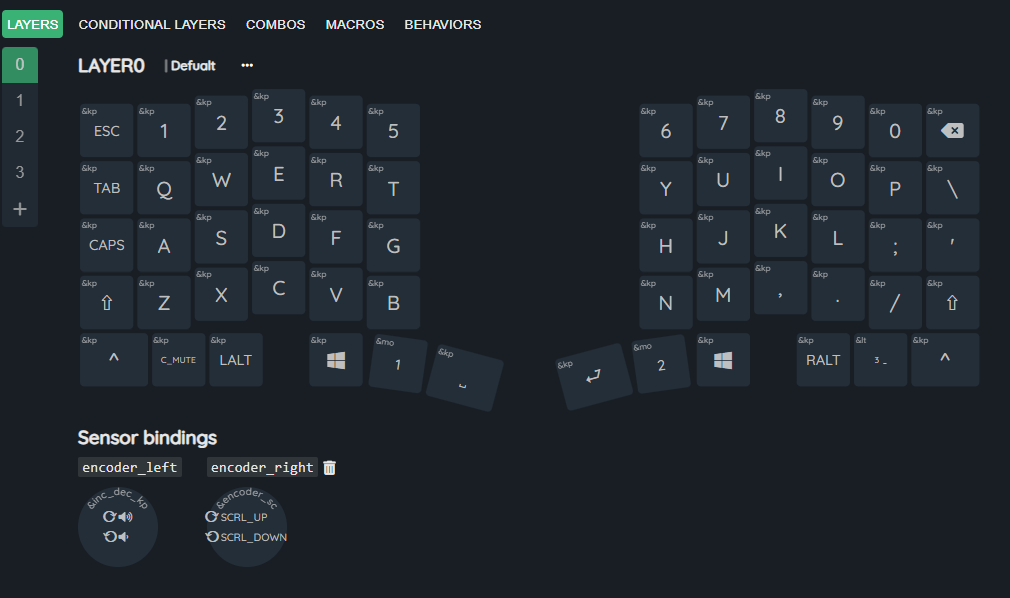
Open https://nickcoutsos.github.io/keymap-editor/, sign in with GitHub, and select your forked repository. After the layout loads:
- Select the target layer.
- Click the physical key position to change.
- Search for or select the desired keycode or action.
- Use the layer selector to edit function, navigation, Bluetooth, or media layers.
- Select Save, then Commit to send the change to GitHub.
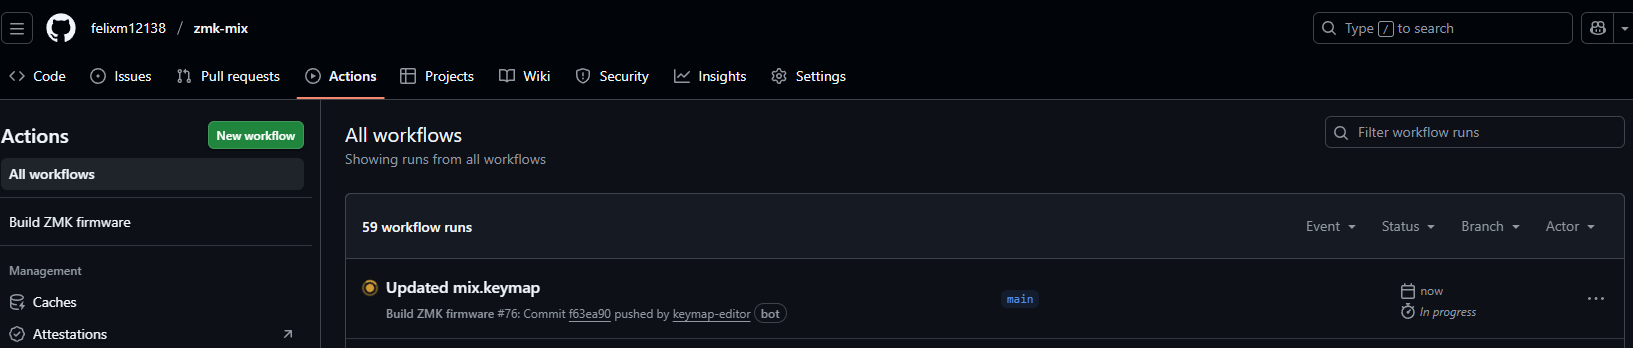
A commit starts the repository's GitHub Actions workflow. Wait for the build to complete successfully, then download the firmware artifact from the workflow page and unzip it.
ZMK keycode reference
When you need a keycode that is not obvious in Keymap Editor, use the official ZMK list of keycodes. It includes keyboard, navigation, media, Bluetooth, mouse, and consumer keycodes, plus compatibility notes for major operating systems.
Add and use layers
Layers let a small keyboard do more without adding physical keys. A typical arrangement has a base layer plus a function or navigation layer. Keep commonly used keys transparent or unchanged on higher layers, and place the new actions only where they help.
A layer key may activate a layer only while held, toggle it on and off, or switch to it. Before replacing a key with a layer action, make sure you still have a reliable way back to the base layer. Test layer keys immediately after flashing or saving.
For &mo, &to, &tog, layer-tap, layer locking, and conditional-layer details, see the official ZMK Layer Behaviors reference.
Flash firmware safely
Only the Keymap Editor route needs this step. Download the successful GitHub Actions artifact, unzip it, and use the firmware file intended for your exact keyboard or controller. Put the keyboard into bootloader mode using the method from its product guide, such as a reset button, a double reset, or a documented key combination. A bootloader drive commonly appears as a removable USB drive; copy the matching .uf2 file to it and wait for the keyboard to restart.
A single keyboard usually has one firmware file. A split keyboard may have a file for each half, a central-half file for ordinary keymap changes, or a special reset firmware. Follow the filenames and flashing order supplied with your model rather than assuming every split keyboard uses the same process.
Bluetooth pairing and troubleshooting
ZMK keeps paired computers, tablets, and phones in Bluetooth profiles. There are five profiles by default. A new device must use an unused profile, or you must clear the existing profile first; starting a new pairing does not automatically replace the device already stored in that profile.
If your keymap exposes Bluetooth controls, common actions include &bt BT_SEL 0 to select profile 0, &bt BT_NXT and &bt BT_PRV to move between profiles, &bt BT_CLR to clear the currently selected profile, and &bt BT_CLR_ALL to clear every profile. The selected profile is saved in the keyboard and normally remains selected after a restart or firmware flash.
To repair a connection or pair a new device:
- Select an unused Bluetooth profile, or select the old profile and clear it with the Bluetooth key documented for your keyboard.
- On the computer, tablet, or phone, remove or Forget the old keyboard entry. This is essential: the host and keyboard each keep a security key, and clearing only one side causes a key mismatch.
- Select the cleared profile again. ZMK will advertise the keyboard as connectable when that profile has no saved pairing.
- Start a new Bluetooth scan on the host and complete pairing.
- Test typing, then switch to other profiles only when you want to send input to a different host.
Several hosts may still show the keyboard as connected, but only the currently active ZMK profile receives keystrokes. For split keyboards, the host Bluetooth connection is managed by the central or primary half; follow the product guide for which half to connect by USB or reset. Avoid BT_CLR_ALL unless you intentionally want to remove every saved device.
For the full command list, profile behavior, and pairing details, read the official ZMK Bluetooth Behavior reference.
Troubleshooting
ZMK Studio cannot find the keyboard: use a data USB cable, connect the documented USB or central half, and confirm that the installed firmware supports ZMK Studio.
Keymap Editor does not show your board: confirm that you selected your own fork and that the repository contains the maker-provided workflow and keymap files.
The firmware build fails: open the failed GitHub Actions run, correct or revert the latest change, then commit again.
The layout is wrong after flashing: return to bootloader mode and flash the last known-good firmware.